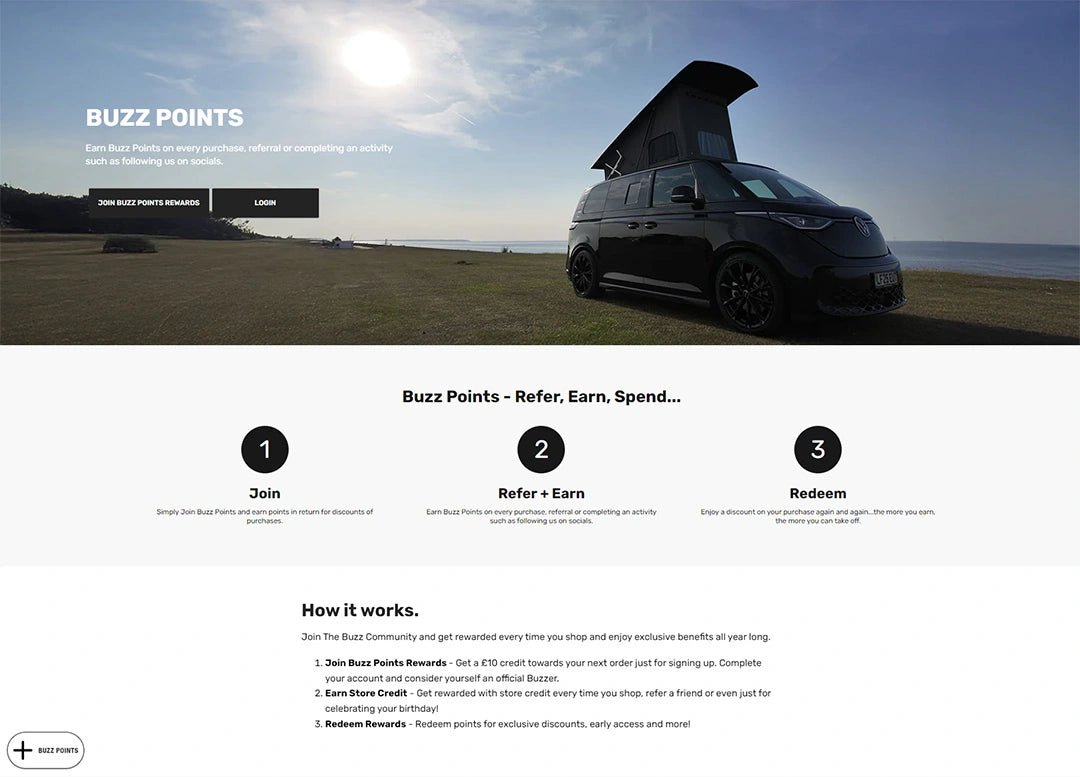
Top 6 Electric Camper Van Conversion Kits for 2026
Imagine pulling up to a seaside cliff in a silent van that feels like a tiny house on wheels. No fumes, no noise, just pure freedom. In this article you’ll see six conversion kits that let you turn an electric van into a livable space, and you’ll learn what to look for when you choose one.
We’ll break down each kit’s hardware, how it fits into the van’s electrical system, the kind of living space it creates, and the real‑world pros and cons. By the end you’ll have a clear shortlist and a quick checklist to help you pick the right kit for your road‑life style.
1. Complete Turnkey Solution (Our Pick)
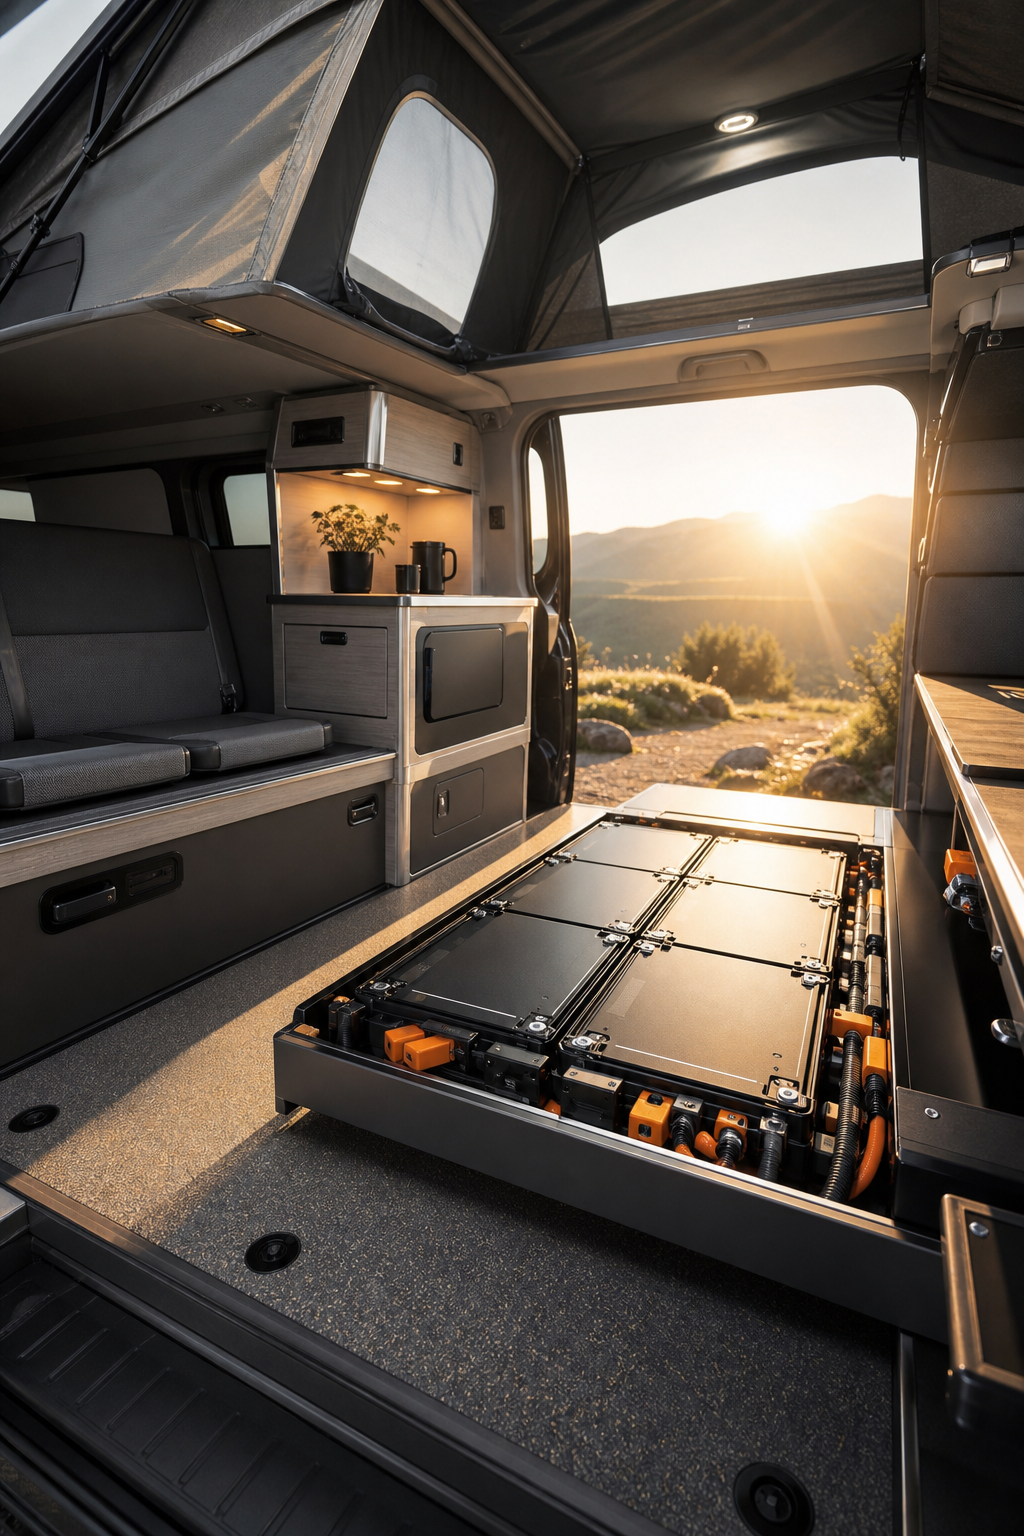
The all‑in‑one power kit is designed for people who want a plug‑and‑play experience. It arrives in a single crate with a 3,600 Wh lithium‑ion battery, a built‑in inverter, and a distribution panel that feeds AC outlets, USB‑C ports, and a 30‑amp RV plug. All the wiring is pre‑terminated, so you only need to bolt the box to the floor and connect a few high‑current cables to the van’s battery.
Because the kit includes an 800 W DC‑to‑DC charger, you can charge the house battery from the van’s high‑voltage pack while you drive. That means the living‑space power never dips, even on long highway stretches.
Installation takes about a day. You start by removing the rear floor panel, mount the battery box, and route the three power cables through existing grommets. The kit’s quick‑disconnect terminals let you unplug the house battery for service without draining the vehicle’s main pack.
What makes this system stand out is its modular interior kit. It ships with a fold‑down table, a set of swivel seats, and a pop‑top roof that folds back into a flat‑packed panel. The pop‑top adds a sleeping loft without raising the van’s centre of gravity.
Owners report that the system runs quiet enough to hear a night‑time rainstorm from the cab. The built‑in battery management system balances charge between the house and vehicle packs, extending overall battery life.
For a quick look at how the power flow works, watch this short video that walks through the wiring layout.
The kit also includes a simple touchscreen that shows real‑time load, state‑of‑charge, and solar input. You can set alerts for low battery or high draw, which helps you avoid a surprise power loss when you’re off‑grid.
One downside is the price; the complete kit runs close to £8,500, but the all‑in‑one nature saves you time and the cost of buying separate inverters, chargers, and panels.
2. High‑Performance Battery Integration Kit
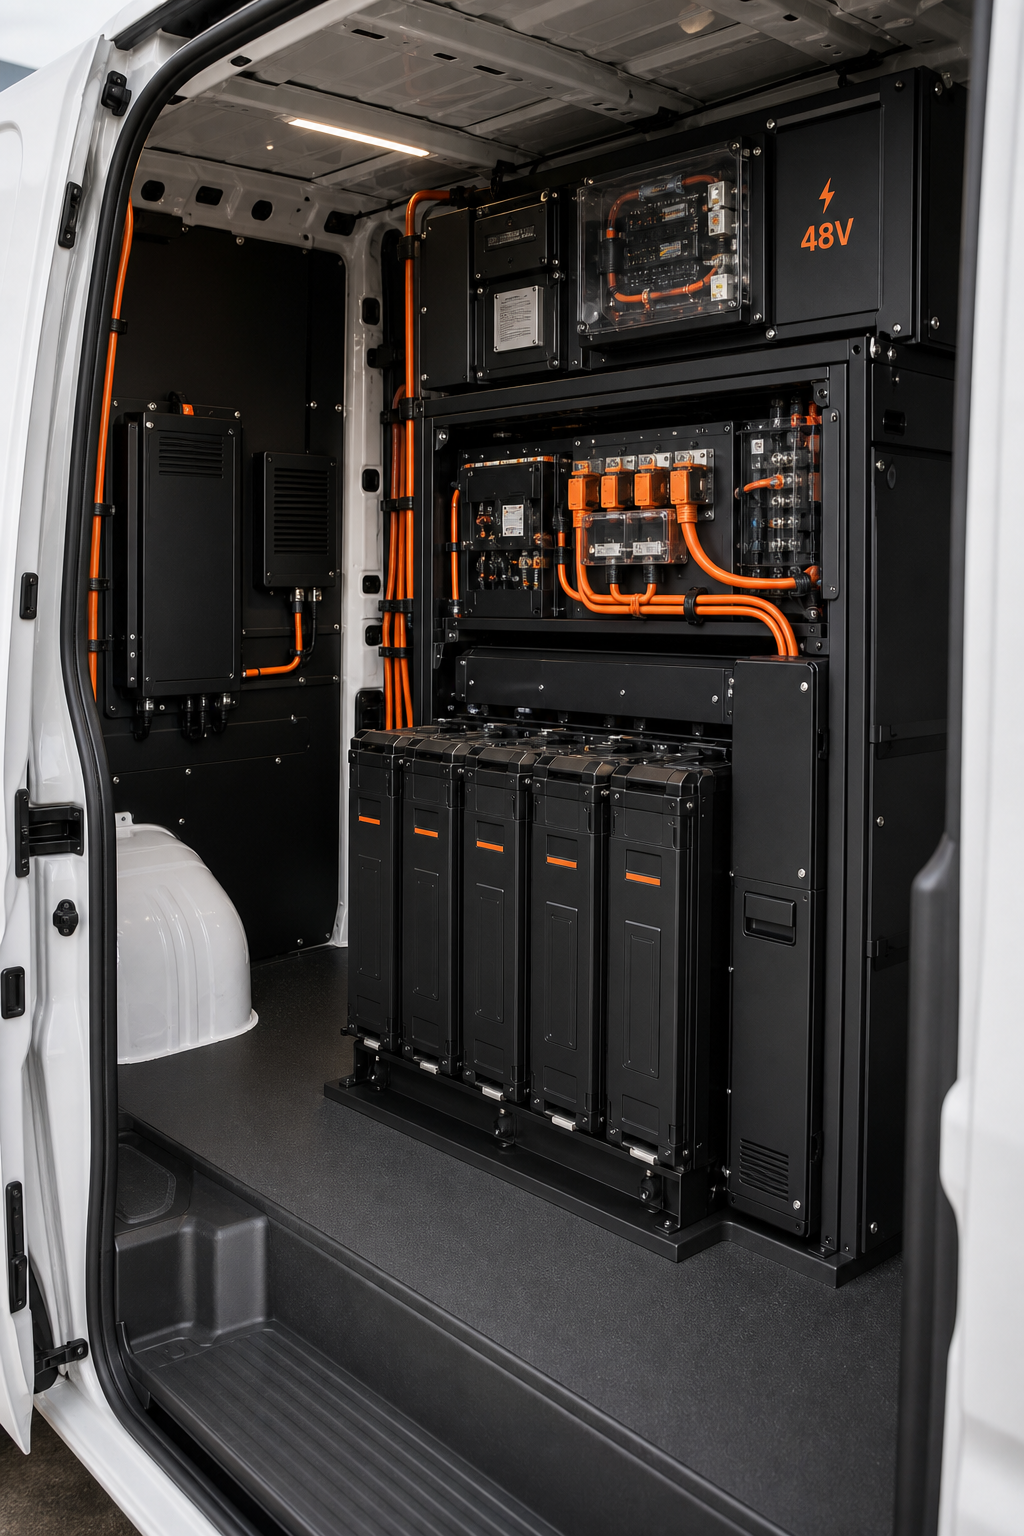
The upcoming electric cargo van promises a massive 700 kWh battery pack and a payload capacity of over 1,200 kg. The high‑performance battery integration kit taps into that raw power, adding a secondary 48 V lithium‑ion bank that feeds a high‑output inverter (up to 5 kW).
The kit is marketed toward adventure‑seekers who need more juice for power tools, electric bike chargers, and even a small fridge that runs on 230 V AC. Because it runs off a separate 48 V bus, you avoid drawing too much from the vehicle’s main pack, which protects range.
Installation is a bit more involved. You’ll need to cut a shallow channel in the floor to lay the 48 V bus bars, then connect them to a DC‑DC converter that steps down from the main 400 V pack. The kit includes a set of waterproof connectors that lock into place with a single hand‑tighten.
Inside, the kit provides a custom‑molded cabinet that houses the inverter, battery management system, and a 12 V/240 V outlet panel. The cabinet can be removed in under an hour for service, which is handy for long trips where you may need to swap the battery.
Because the van’s chassis already has an integrated solar‑ready roof, you can mount up to 1 kW of flexible panels without drilling new holes. The kit’s MPPT controller talks to the vehicle’s CAN bus, so you get real‑time data on solar harvest.
One of the biggest benefits is the ability to use the vehicle’s regenerative braking to top up the house battery while you drive downhill. That trick can add an extra 5–10 km of electric range on a hilly route.
However, the kit’s price tag sits around £12,000 and the installation requires a professional welder for the bus bars. It’s best suited for people who already own a compatible electric cargo van or are planning to purchase one.
Manufacturer documentation notes that the secondary battery can be charged at up to 150 kW when plugged into a fast‑charge station, meaning you can refill the house battery in under an hour.
For those who love data, the kit’s app shows voltage, current, and temperature graphs, letting you fine‑tune your power usage on the road.
3. Integrated Home Battery System, Smooth Ecosystem
Using a recycled home battery module as a house battery gives you a proven, high‑density lithium pack that fits neatly on the rear wall of most van models. The module’s 13.5 kWh capacity is more than enough for a fridge, lights, and a small heater on a typical weekend trip.
Integration is straightforward if you already own a compatible vehicle or have a home charger at home. The module’s built‑in inverter can feed 120 V AC directly to the van’s interior wiring, meaning you only need a single AC inlet and a grounding strap.
Because the system talks to a dedicated app, you can monitor charge levels, set charging windows, and even enable “Backup Reserve” mode, which keeps the house battery topped up in case of an emergency.
One clever trick is to use the “Battery to Vehicle” feature: when you plug the van into a fast charger, the vehicle’s high‑voltage pack can charge the home battery, effectively turning the charger into a massive house‑battery charger.
Weight is a consideration, the module adds about 120 kg, which can affect payload. However, the compact shape means it can be tucked under a bench seat or behind a kitchen cabinet without sacrificing interior space.
For safety, the module includes a built‑in fire‑suppression system and temperature monitoring, which are essential for the confined environment of a camper van.
Overall, the integration shines when you already rely on a unified home‑energy ecosystem for charging. It offers smooth monitoring, reliable performance, and a sleek, low‑profile design.
4. Flexible Capacity Options
The modular battery system offers a stackable 5 kWh “brick” unit design, allowing you to reach the capacity you need. The system uses a 48 V bus and a smart BMS that balances each brick automatically.
What makes it flexible is the ability to add or remove bricks as your power needs change. If you start with a single brick for a short weekend, you can later expand to three bricks for a two‑week expedition.
Each brick comes with a built‑in inverter that can deliver up to 2 kW of continuous AC power. The bricks bolt onto a reinforced frame that slides into the van’s cargo area, making removal simple. The kit also includes a touchscreen that shows each brick’s state‑of‑charge, temperature, and health. The BMS can be programmed to limit draw on any brick that gets too hot, protecting the pack in extreme weather.
Installation requires cutting a small recess in the floor for the bus bars, but the kit supplies pre‑drilled brackets and a step‑by‑step guide that even a DIY‑novice can follow.
Because the system is vendor‑agnostic, you can pair it with any electric van, such as a popular compact model, a standard commercial van, or a custom build. The only limitation is that the van must have a 48 V accessory port or a DC‑DC converter.
Optional solar‑ready brackets let you mount up to 600 W of panels on the roof. The panels charge the bricks directly, bypassing the vehicle’s main pack.
Buying Checklist , What to Look For
Before you spend a few thousand pounds on a conversion kit, run through this quick checklist:
- Does the kit include a pre‑wired distribution panel? If not, you’ll need extra wiring.
- Can the kit be installed without welding or major structural changes?
- What is the total usable capacity (kWh) after accounting for depth‑of‑discharge limits?
- Does the system support solar input, and if so, what is the maximum wattage?
- Is there an app or display that lets you monitor usage in real time?
- Are safety features like fire suppression, temperature monitoring, and fusing built in?
Answering these questions will help you match a kit to your van model, travel style, and budget.
FAQ
Can I install an electric camper conversion kit myself?
Yes, many kits are designed for DIY enthusiasts, but you’ll need basic electrical knowledge, the right tools (crimping tool, torque wrench, multimeter), and a safe workspace. Follow the manufacturer’s wiring diagram step‑by‑step, double‑check all connections, and test each circuit before finalising the interior build. If you’re unsure about high‑voltage work, hire a certified electrician for the bus‑bar installation.
How does an electric conversion affect the van’s warranty?
Most manufacturers allow third‑party conversions as long as you don’t modify the drivetrain or battery pack. Adding a separate house battery and inverter usually doesn’t void the vehicle warranty, but altering the high‑voltage system can. Check the warranty booklet or contact the dealer before you start, and keep all receipts and installation photos as proof of proper work.
What is the typical range loss after adding a conversion kit?
Range loss varies with the kit’s weight and power draw. A 100 kg battery pack can shave about 5‑10 % off the vehicle’s EPA‑rated range. To minimise loss, choose lightweight lithium modules and place them low in the chassis. Using solar panels to top up the house battery while driving can recover some of that lost range.
Do I need a separate charger for the house battery?
Most kits include a DC‑to‑DC charger that pulls power from the van’s main pack while you drive. If you plan to charge from shore power or solar only, you’ll need an AC charger that matches the house battery’s voltage (typically 12 V, 24 V, or 48 V). Look for a charger with multi‑stage charging and temperature monitoring for safety.
How much solar panel area is enough for an electric camper?
A good rule of thumb is to aim for 300‑400 W of solar per 2‑person household. That usually means two 200 W flexible panels mounted on the roof. If you have higher loads (e.g., a heater or large fridge), add another 200‑300 W panel or use a portable roll‑out panel when parked in the sun.
Is it safe to use a diesel heater with an electric conversion?
Yes, as long as you wire the heater to a dedicated 12 V circuit with a high‑current fuse (usually 15‑20 A). Many kits include a standard power port that can handle the heater’s surge current. Install a carbon monoxide detector inside the van and ensure proper ventilation to keep the cabin safe.
Conclusion
Choosing the right electric camper van conversion kit is all about balancing power, space, and budget. The comprehensive starter kit gives you a complete, ready‑made solution that’s perfect for newcomers. A high‑performance power kit is a great fit for power‑hungry adventurers who already own an existing electric van. An integrated home‑battery solution shines for those already in a connected energy ecosystem, offering smooth monitoring and backup power. Modular battery blocks let you start small and grow your capacity over time, making them ideal for phased upgrades.
Each option has trade‑offs, the starter kit is simple but pricey, the high‑performance option is powerful but complex, the connected battery solution offers great software but adds weight, and the modular system provides flexibility at the cost of extra planning. Think about how you’ll use the van: weekend trips, full‑time living, or remote work. Match the kit’s features to those needs, and you’ll end up with a conversion that feels like an extension of your lifestyle rather than a compromise.
Ready to hit the road with a custom build? Try Buzz Conversions free → Their award‑winning ID. Buzz Cargo Kombi‑Campervan Conversion combines a pop‑top roof, Kombi‑Seats, and modular Pods, delivering the most flexible living space on the market today.
Take the checklist, compare the specs, and start planning your electric van adventure now. The road is waiting, and with the right kit you’ll travel cleaner, quieter, and farther than ever before.